Manage Roles
Return to Manage Infrastructure
ServicePRO allows teams and users to be granted one or many privileges or permissions within the system. If there is a collection of privileges that are often granted to users and/or teams, you can consolidate those using Custom Roles.
User with the “ServicePRO Administrator” privilege can add, update, or de-activate a custom role as needed.
Navigation
- Navigate to the main menu by clicking on the ServicePRO icon.
- From the Management tab, click on the Manage Roles option as highlighted below.
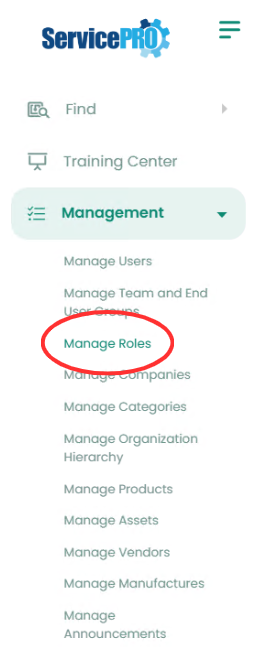 Manage Roles Navigation
Adding Roles
- Click on the New Role icon in the ribbon toolbar. The New Roles window opens.
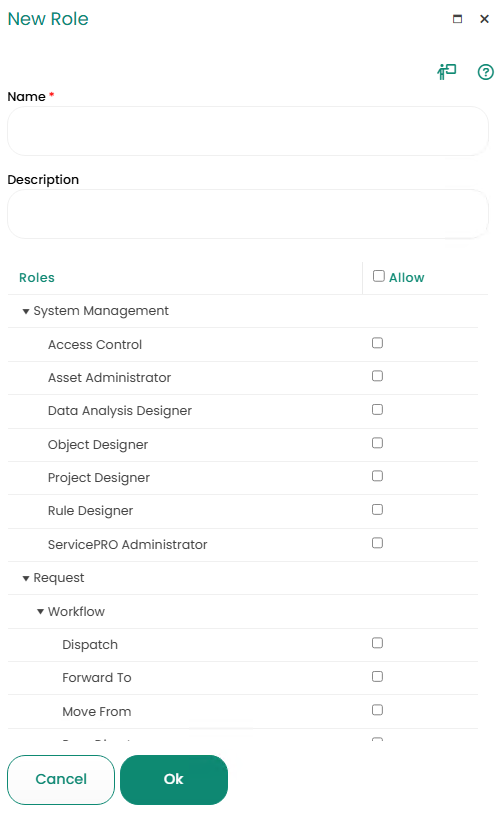 The New Role Window.
 - In the Name field, enter the title of the role being created such as ‘Management’ or ‘Project Coordinator’ etc.
- Select the set of privileges which will be assigned when the Custom Role is granted.
Saving the Role
Click the Ok button on the bottom of the window to save the new role.
Managing Existing Roles
User with the “ServicePRO Administrator” privilege can add, update, or de-activate a custom role as needed.
Searching for Roles

- Click on Simple Search to select criteria from the Search and Match drop-down lists and enter a value in the Value field to help you narrow the list presented in the table below this work area. For example: Search: “Name” Match: “Contains” Value: “Support” This tells the system to search for all roles whose names include the name “Support.”
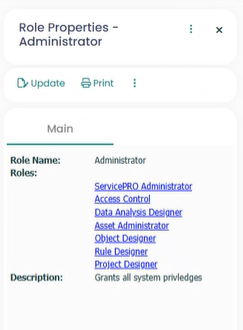
- Select the role you need to update by clicking on the role and selecting "Update" in the tool bar. The role properties will be displayed in a side panel window. Role properties will appear with a Ribbon Toolbar that includes manage task group as shown in the figure below.
Ribbon Toolbar

The Ribbon Toolbar includes several task groups:
1. Create
- New Role - Create a New Role to be added to the ServicePRO system.
2. Manage
- Update - Update role information.
- Grant Access - Open the RBAC module and select Users to grant roles to.
- De-Activate - De-Activate a Manufacturer. This will not delete the Manufacturer, but will remove the Manufacturer from views/search results.
- Export – Export the roles listing in XLS format.
3. Properties
Invoking Menu option for viewing the Role (object) properties, will open the object's property in a Right-Hand Side (RHS) Panel, so the user will not lose the context from the listing that is being reviewed.
- Role – View Role Properties: Role Name, Roles and Descriptions are included. The Ribbon Toolbar in the Properties menu allows for additional options.
- Update – Update role information.
- Print – Print the role’s properties.
- Output to Text File – Will allow you to save the team properties to the text file.
4. Manage Search
- Set Current Search Filter as Default: By default, name is the selected filter used to search for a ServicePRO object. By selecting this option, you can choose another filter as your default for future searches.
- Restore Default Search Filter: Set the search filter to the system default (name).