
End User - Submitting Service Requests
Return to End User -Self Service Portal
Submitting Service Requests
Select the New Request button from the upper right corner to submit a Service Request.
Based on the default setting specified by your administrator or by your last selection for submission mode, the New request wizard or the single form interface will open.
Single Form Submission
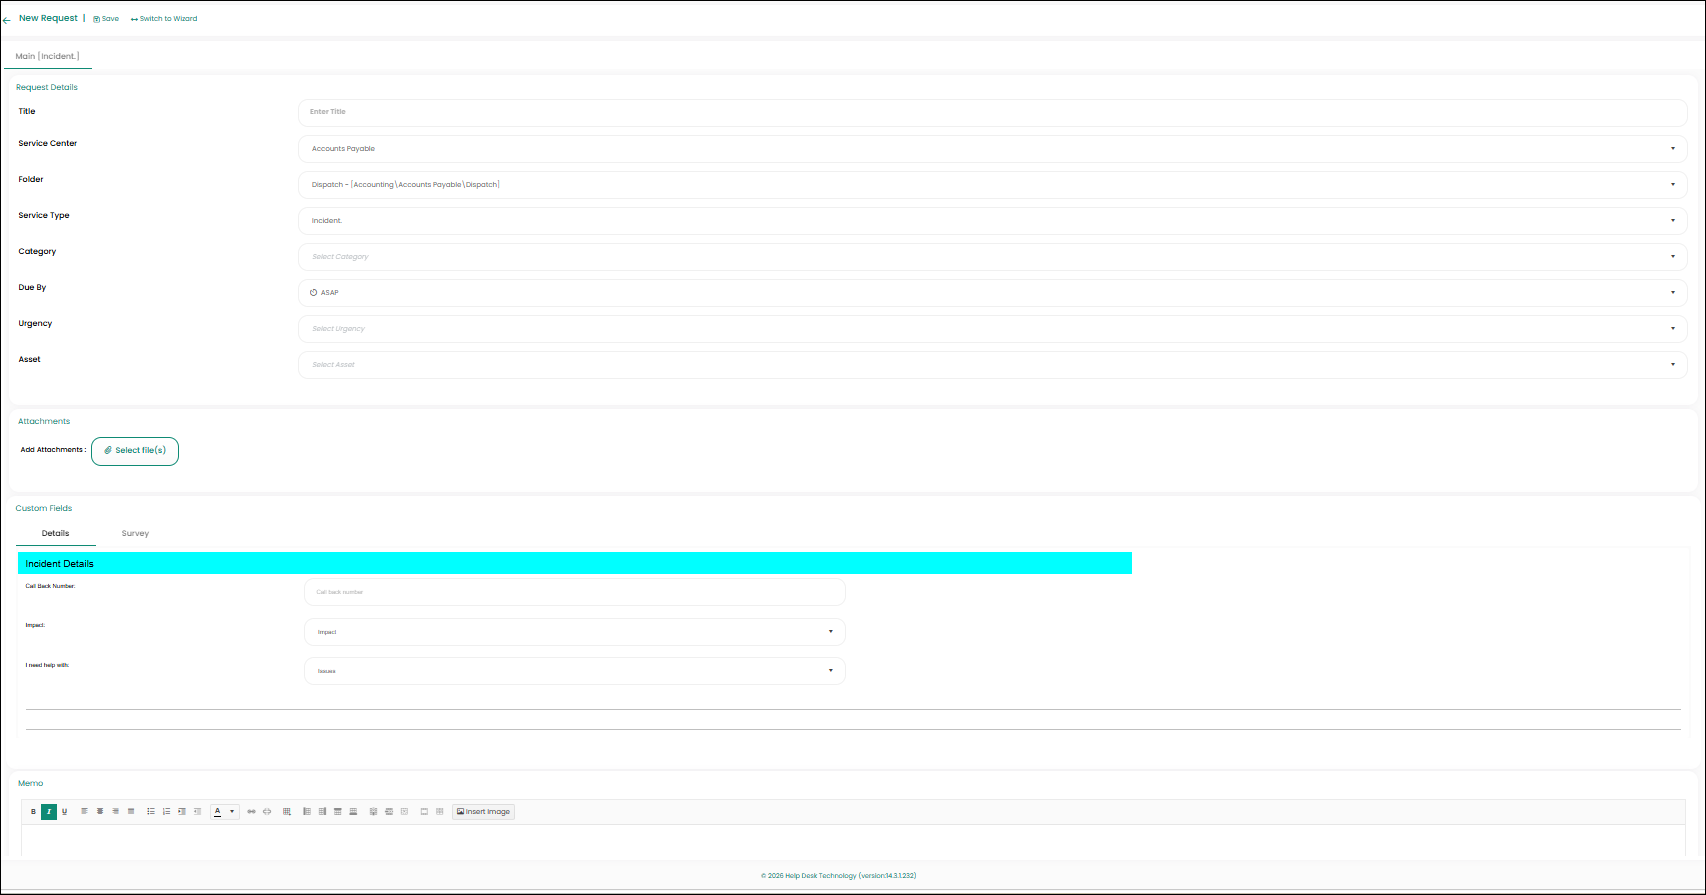
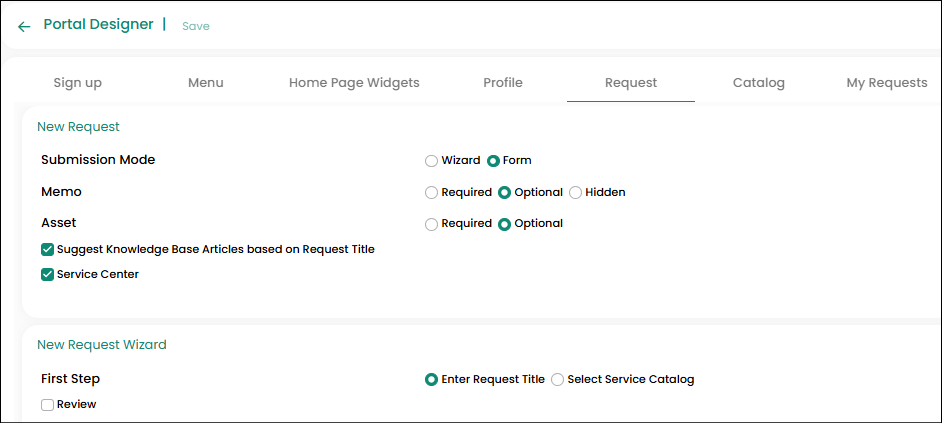
The single form submission allows users to enter all required information on a single form and submit in one step. The individual options available and the order of form sections can be customized using the End User Portal Designer
Request Details
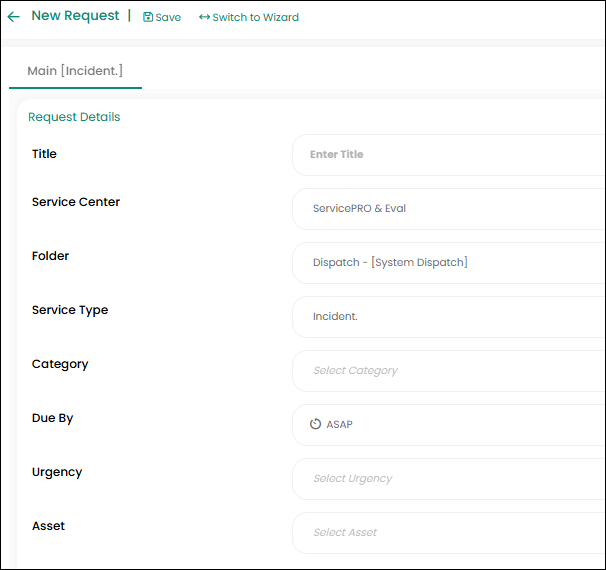
In the request details section, enter criteria for how the Service Request should be categorized. The fields entered here will determine information such as the folder for the request, which department the request should be queued to, as well as provide additional information for Service Representatives.
Enter criteria for the following catalog fields:
- Title – Enter the service request title
- Service Center – Select from departments or organizational units such as Development, Facilities, Human Resources or Tech Support
- Folder – Select from Folders for Support Reps such as System Dispatch, or In Queue.
- Service Type – Select from types of Service Requests, such as standard Service Requests, Purchase Requests, Quick Requests or Project Requests. Service Types can be enabled or disabled by the Administrator, so all options may not be available.
- Category – Select a Category for the request to be associated to. Examples Categories include Asset Management, Development, or Tech Support.
- Due by – By default, this field is set to ASAP, but users may select specific due date using a Calendar, and designate exact time values if desired. Users can also use the Advance Notification field to send early notifications of due dates, in days.
- Urgency – Choose between Low, Medium, High and Critical Urgency for the request.
- Asset – Choose any associated Assets with this request which is allocated to the user.

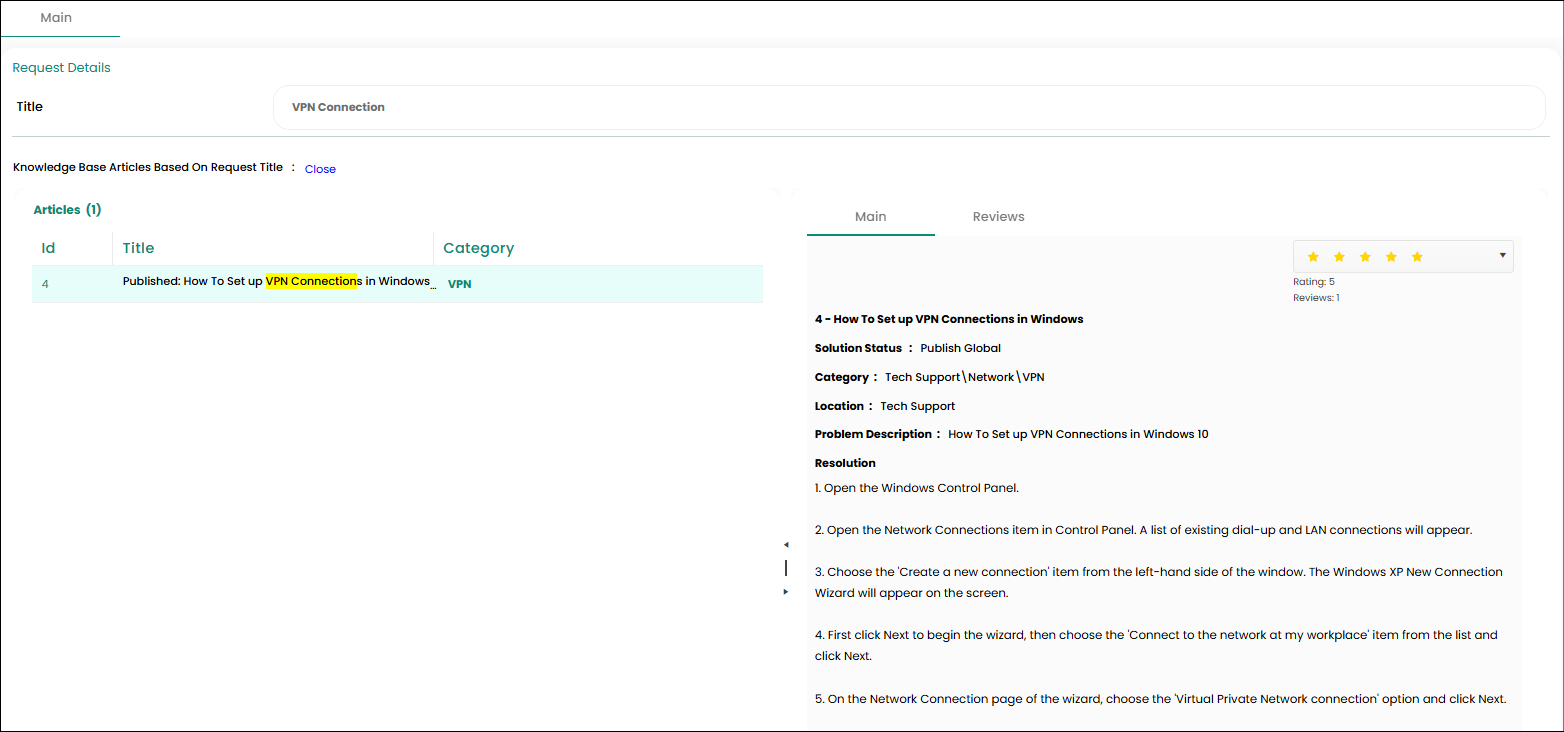
View Best Solutions Articles via Title
ServicePRO will automatically load a list of Best Solutions articles by matching for words used in the request title entered by the User. These entries are created by Support Reps to quickly answer resolve common issues and questions based on past tickets.
Memo
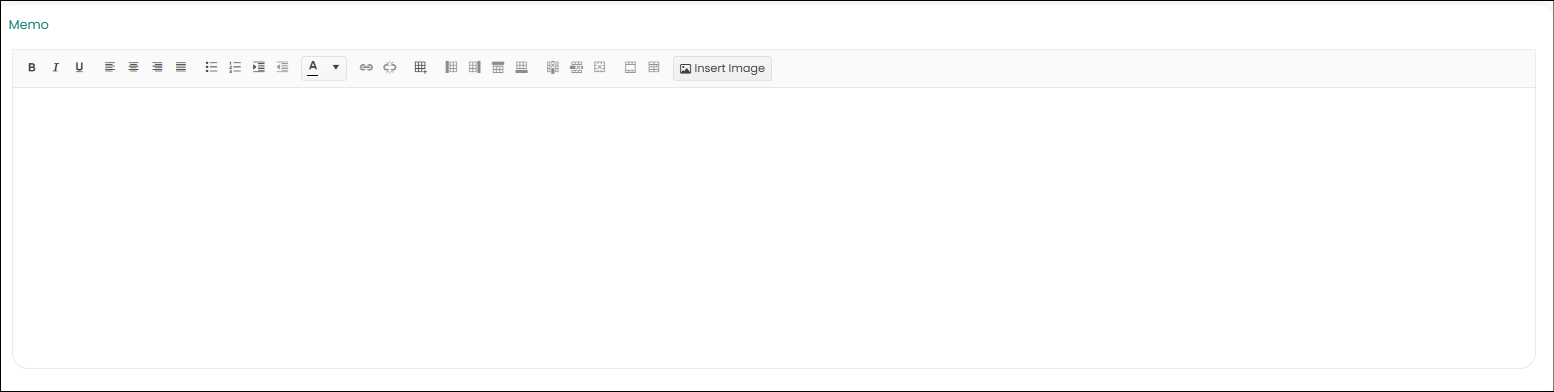
Enter the details of the request in the memo text field. Standard word processing tools are available in the header bar above the memo field, such as font sizes, color editing and alignment. If using IE you can also cut and paste text and images into the memo field
Attachments
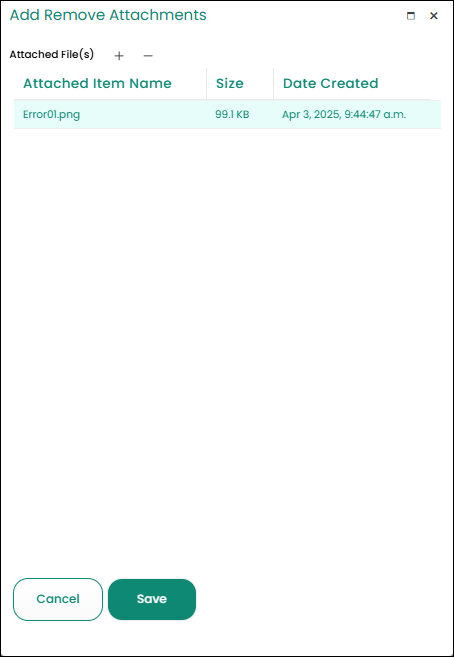
Select an attachment to include with the Memo. The attached file will be available in the Documents tab when reviewing the Service Request.
An attached file will be accompanied by a confirmation of the upload, as shown below.

Add Purchase Line Items
The Purchase Line Item grid is available when the End User has chosen Purchase Request from the Service Catalog’s Service Type field.
When editing Purchase Items to the listing, the following options are available:
- Add Line Item
- Delete Line Item
- Edit Line Item
The following fields are available when adding Purchase Line Item selections:
- Product Selection
- Quantity
- Due By
- Urgency
- Line Item
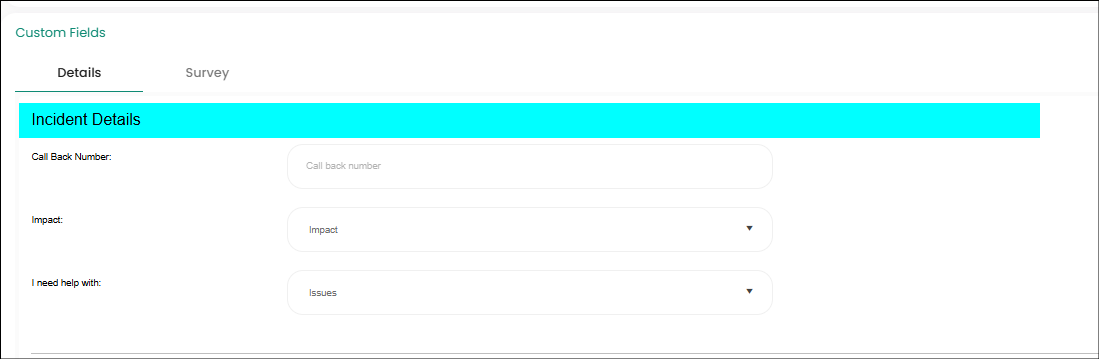
Custom Fields
The Custom Fields section is available if a Custom type is selected.

Save
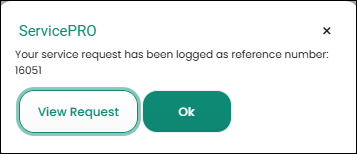
To save the request, click the Save button, which is located at the top of the request form. If there are missing required fields and errors occur, user will be shown this on the form.If all fields have been entered correctly, the User will be shown the message “Your request has been logged as reference number #[Request Number]”, and on clicking ok button in the pop up the user will be automatically taken back to the Home page. Clicking on View Request button previews the request in new browser tab.

Switch to Wizard
This option allows the user to switch the new request submission mode. Once the option is selected, it will be persistent for the user and will override the portal designer default submit mode selected by the administrator.
New Request Wizard
The New Request Wizard guides the user through submitting a new request. Users can navigate between each step using the Prev, Next and Cancel buttons on each page.

Title
In this tab, choose the desired title for your Service Request.
Enter title, which will allow you to enter the title in the text field.

View Best Solutions Articles via Title
ServicePRO will automatically load a list of Best Solutions articles by matching for words used in the request title entered by the User. These entries are created by Support Reps to quickly answer resolve common issues and questions based on past tickets.
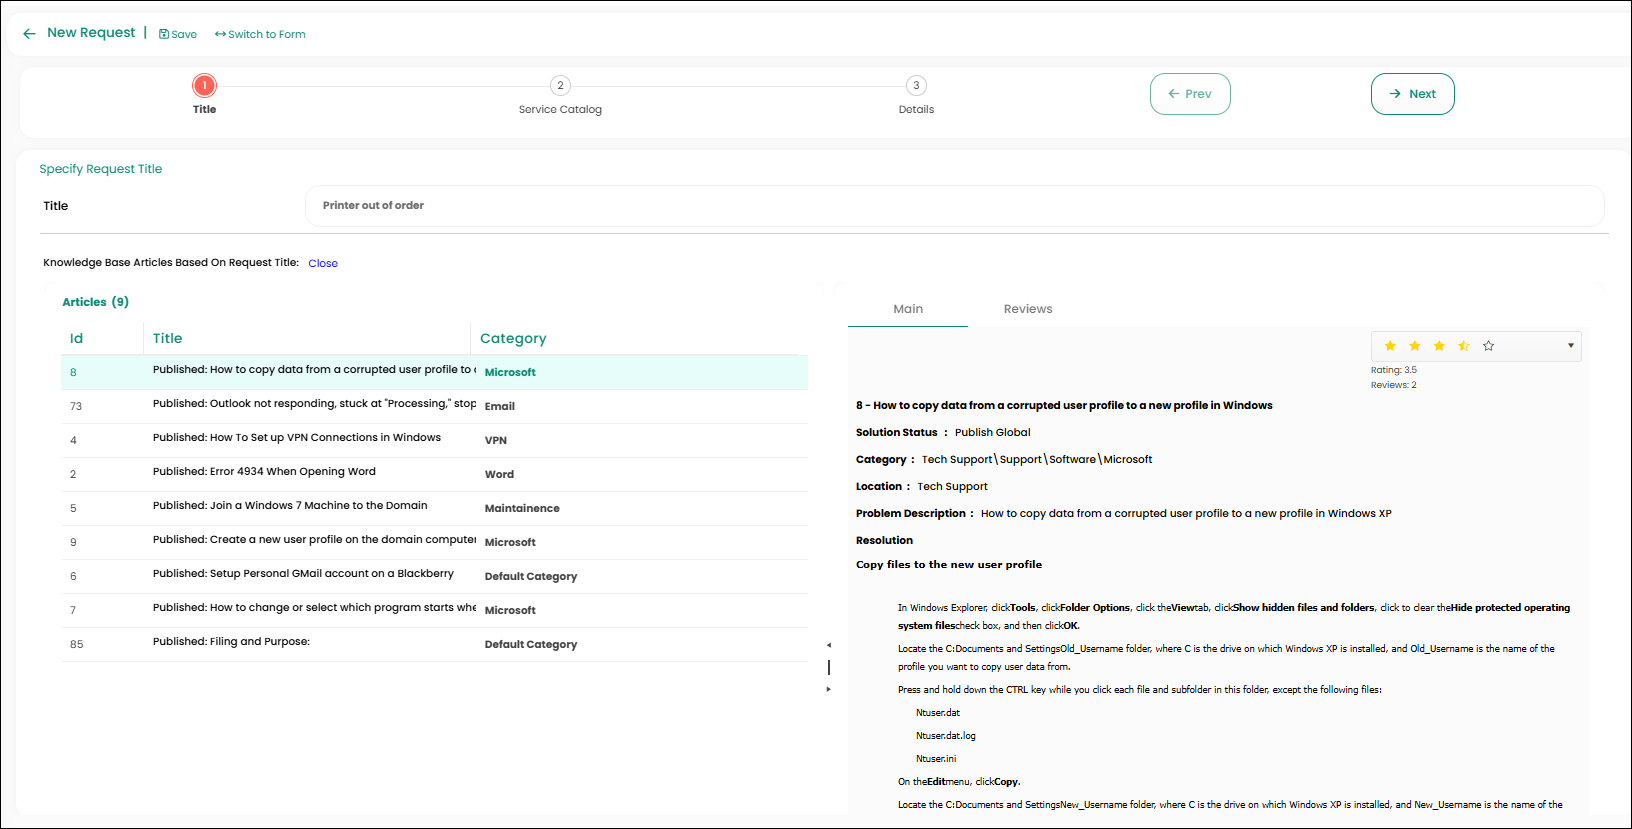
If the Knowledge Base article answers are not sufficient for resolving the issue, Users may proceed to the next step by selecting the Next icon.

Service Catalog
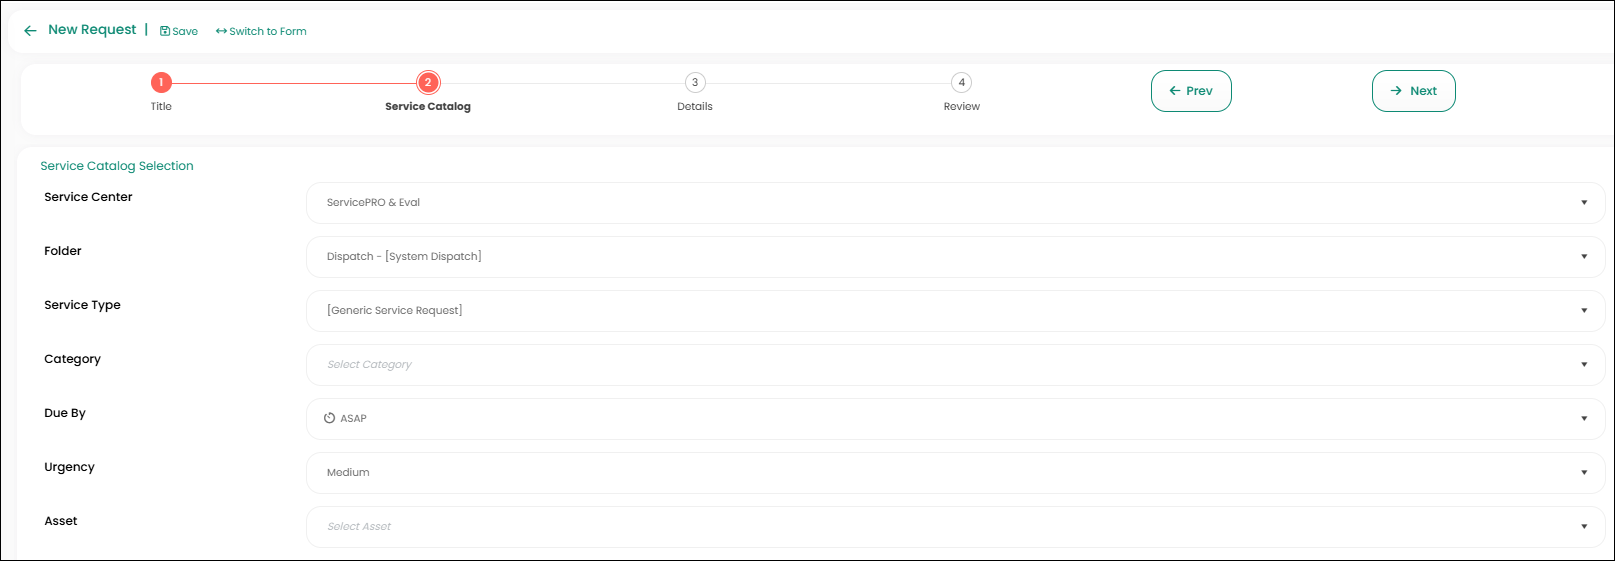
In the Service Catalog tab, enter criteria for how the Service Request should be categorized. The fields entered here will determine information such as the folder for the request, which department the request should be queued to, as well as provide additional information for Service Representatives.
Enter criteria for the following catalog fields:
- Service Center – Select from departments or organizational units such as Development, Facilities, Human Resources or Tech Support
- Folder – Select from Folders for Support Reps such as System Dispatch, or In Queue.
- Service Type – Select from types of Service Requests, such as standard Service Requests, Purchase Requests, Quick Requests or Project Requests. Service Types can be enabled or disabled by the Administrator, so all options may not be available.
- Category – Select a Category for the request to be associated to. Examples Categories include Asset Management, Development, or Tech Support.
- Due by – By default, this field is set to ASAP, but users may select specific due date using a Calendar, and designate exact time values if desired. Users can also use the Advance Notification field to send early notifications of due dates, in days.
- Urgency – Choose between Low, Medium, High and Critical Urgency for the request.
- Asset – Choose any associated Assets with this request which is allocated to the user.
Details
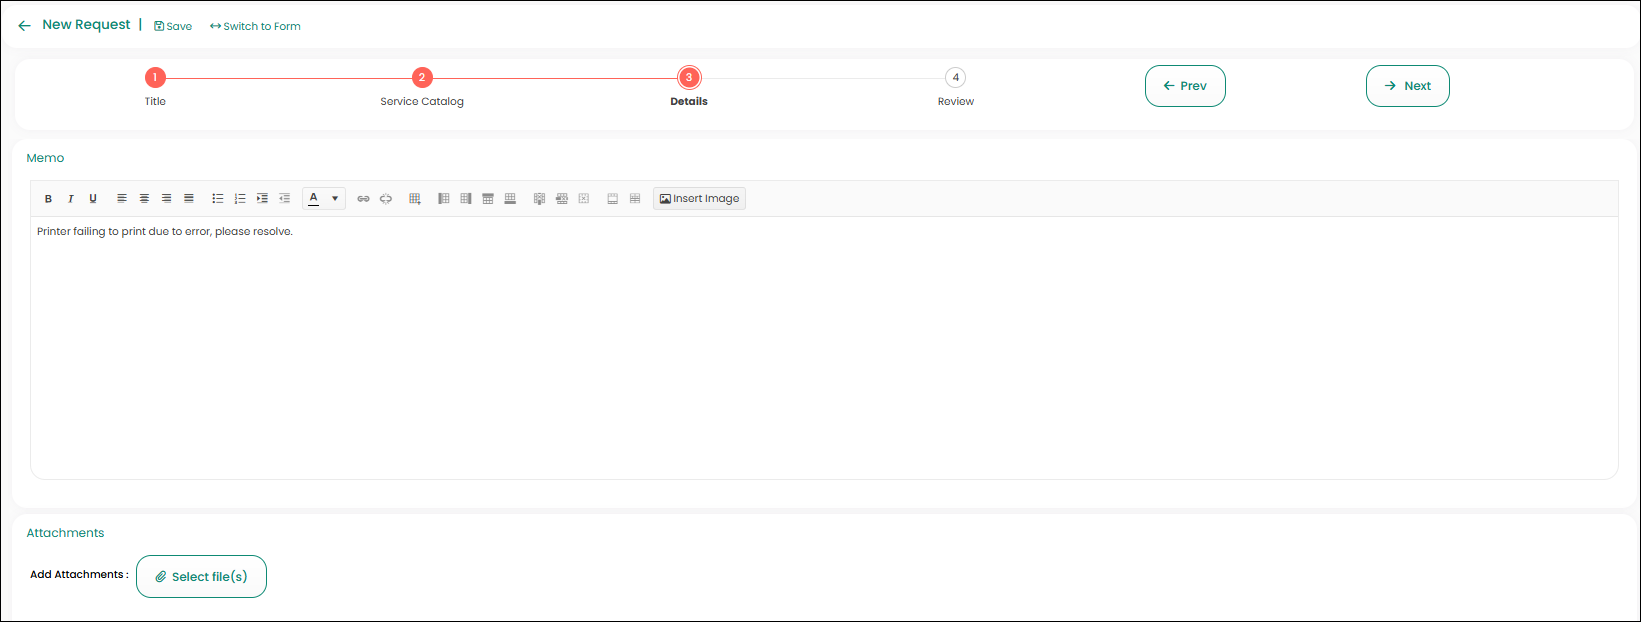
In the Details Tab, users can enter written details for their request in the memo, as well as include attachments.
Memo
Enter the details of the request in the memo text field. Standard word processing tools are available in the header bar above the memo field, such as font sizes, color editing and alignment. If using IE you can also cut and paste text and images into the memo field
Attachments
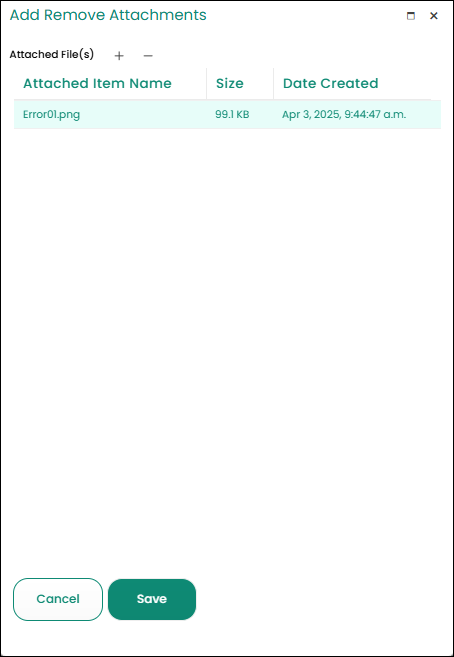
Select an attachment to include with the Memo. The attached file will be available in the Documents tab when reviewing the Service Request.
An attached file will be accompanied by a confirmation of the upload, as shown below.
Add Purchase Line Items
The Purchase Line Item grid is available when the End User has chosen Purchase Request from the Service Catalog’s Service Type field.
When editing Purchase Items to the listing, the following options are available:
- Add Line Item
- Delete Line Item
- Edit Line Item
The following fields are available when adding Purchase Line Item selections:
- Product Selection
- Quantity
- Due By
- Urgency
- Line Item
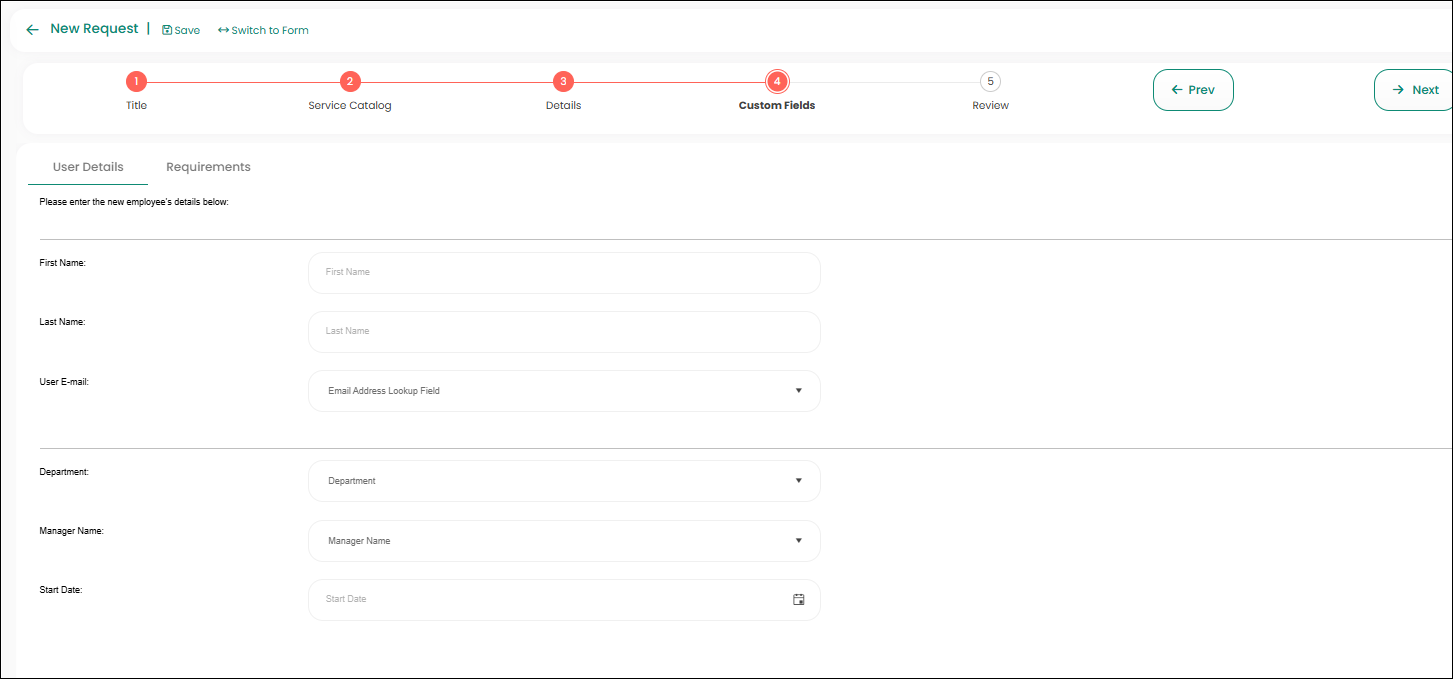
Custom Fields
The Custom Fields tab is available if a Custom type is selected.
Review
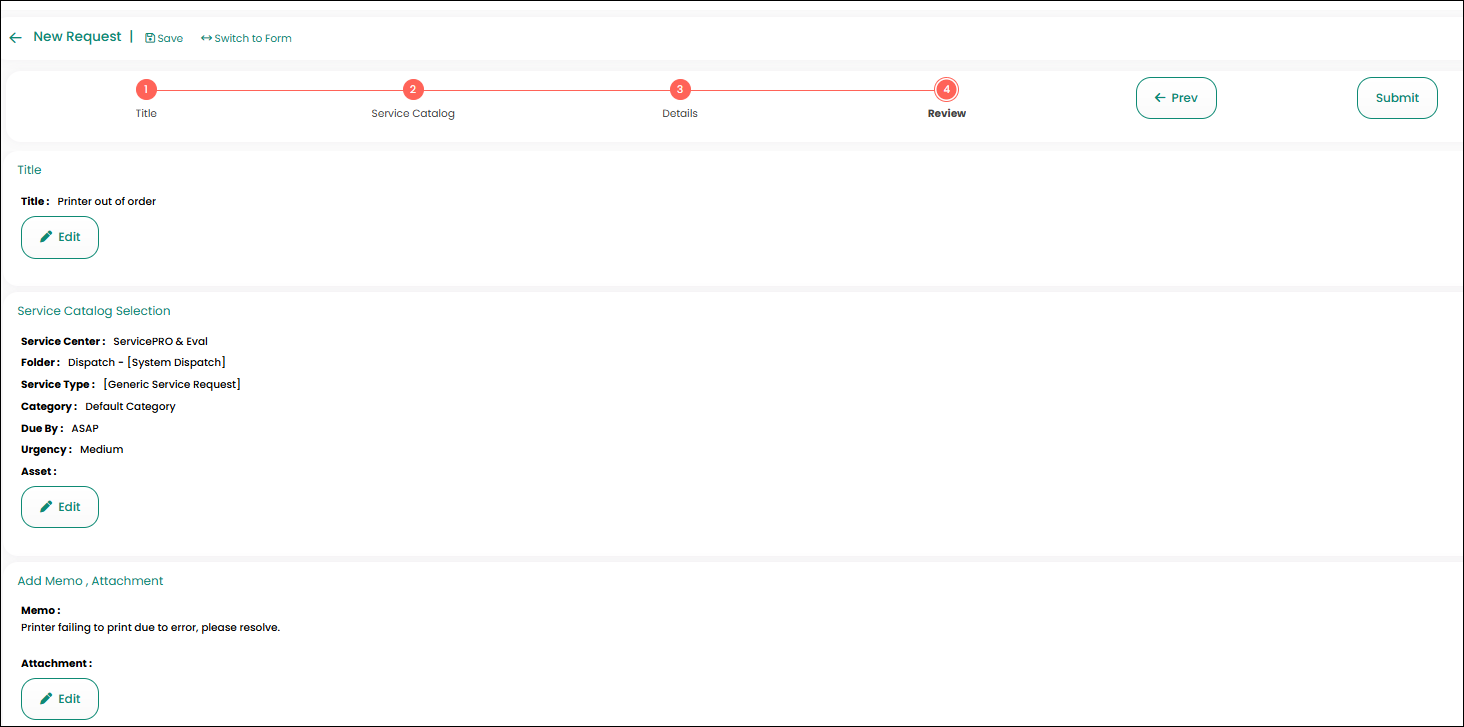
This page will be displayed at the end, allowing the end user to review their selections made in previous steps.
Every selection will feature an Edit button that can take the User back to the original step for further editing if necessary. Selecting each step will also perform the same function.
Submit
After completing a review of the summary, Users can select the Submit button, which takes the place of the Next button in previous steps.
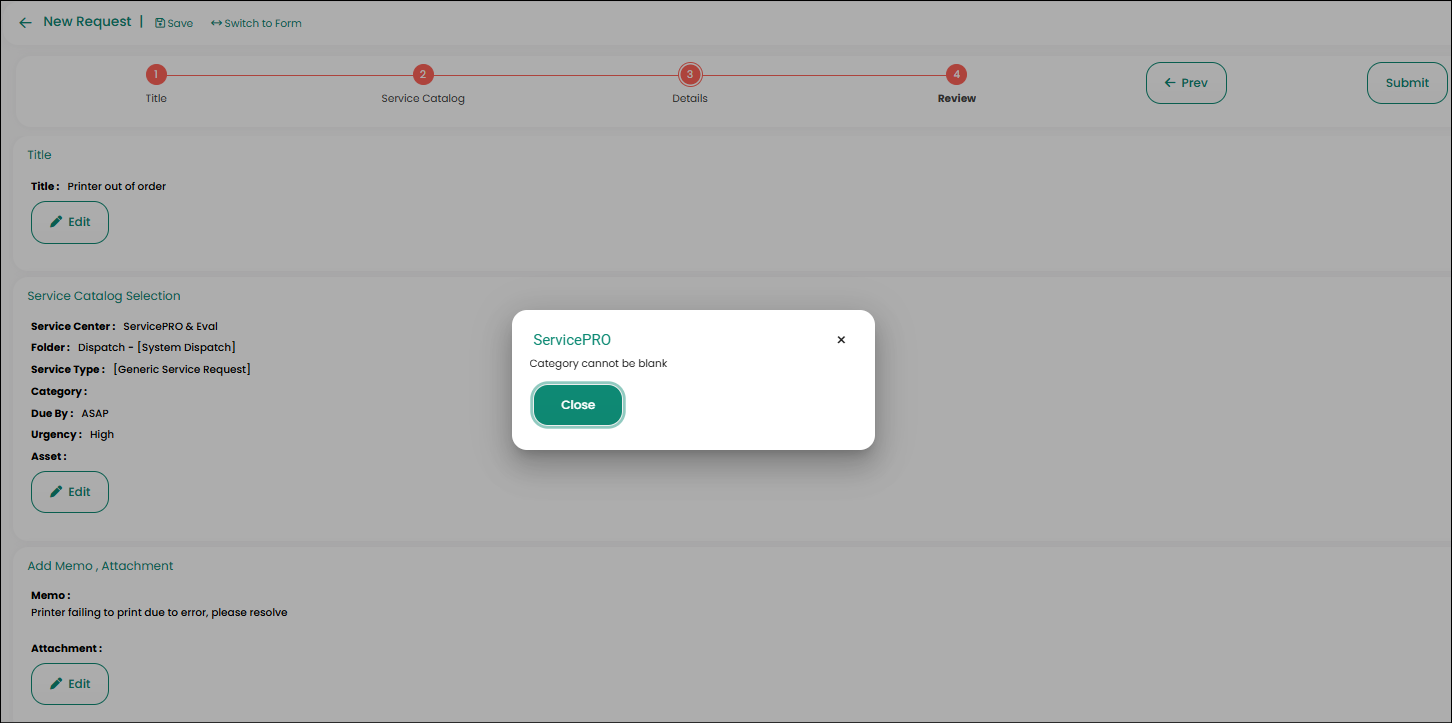
If any errors occur, the User will be displayed the message so that the user can go back to the original step to make appropriate edits.
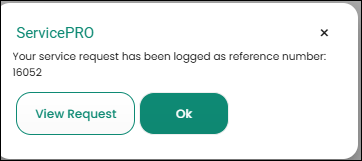
If all fields have been entered correctly, the User will be shown the message “Your request has been logged as reference number #[Request Number]”, and on clicking ok button in the pop up the user will be automatically taken back to the Home page. Clicking on View Request button previews the request in new browser tab.
The request will be listed at the top of the Recent Updates Widget.
