Manage Vendors
Return to Manage Infrastructure
A vendor is a company type from which your organization will be purchasing products or services.
Navigation
- Navigate to the main menu by clicking on the ServicePRO icon.
- From the Management tab, click on the Manage Vendors option as highlighted below.
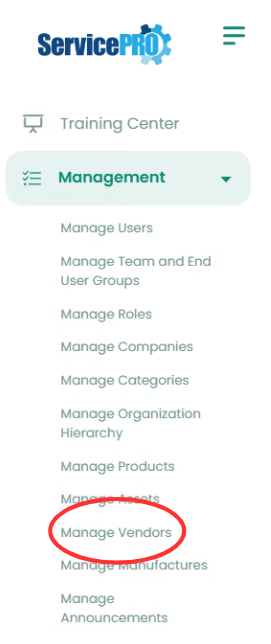 Manage Vendors Navigation
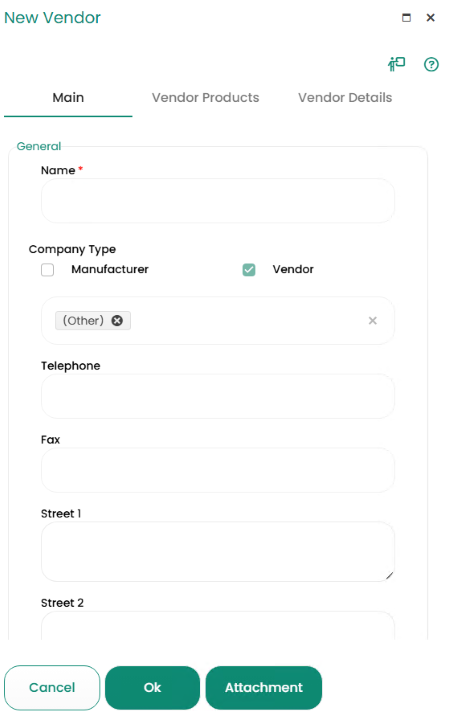
Add New Vendors
Users with the ServicePRO Administrator Role can add new vendors.
From the Manage Vendors Ribbon Toolbar, click on the New Vendor icon. The New Vendor window appears. It includes three tabs, Main, Vendor Products and Vendor Details.
Main Tab
In the Main Tab, users can add General information and a Memo detailing the Vendor.- Select whether the Vendor you are adding is also Manufacturer or other custom Type.
- Manufacturer – A company that creates a product. When Manufacturer is enabled, the Manufacturer Details tab is also available. The Manufacturer Details tab can contain custom fields to capture additional information about manufacturer. The custom fields can be created using the Custom form Designer.
- Vendor – A company that sells the product. By default, this field is selected. When Vendor is enabled, the Vendor Products and Vendor Details tabs are available. The Vendor Details tab can contain custom fields to capture additional information about vendor. The custom fields can be created using the Custom form Designer.
- Other– This drop-down list is populated with additional Company Types created via the Custom form Designer.
- Enter the contact information for the vendor.
- In the Memo field, enter any additional information about the vendor.
Vendor Products Tab
The vendor company type is used in relation to purchase orders because requested products must be associated with a vendor. When a company is designated as a vendor, a Vendor Products tab appears in the New Vendor window as shown below.
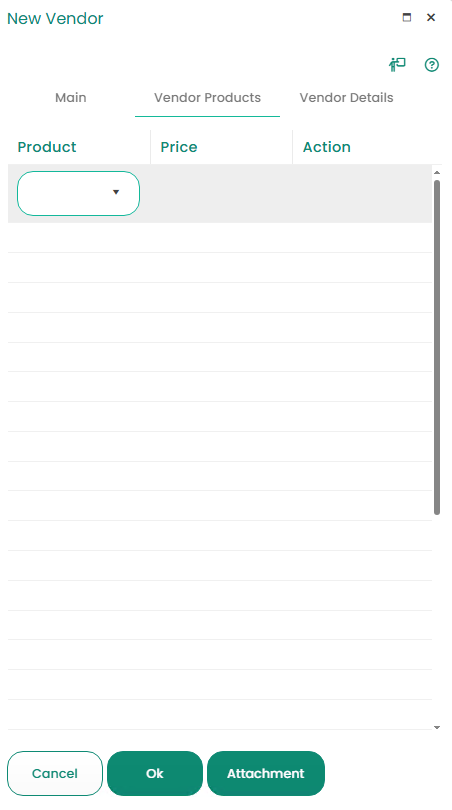
- In this window add products that the vendor sells.
- Add a cost for each product in the Price field.
- You can continue adding products by clicking on the row after each entry and adding a new line item.
- When all products have been entered for this vendor, click the Ok button at the bottom of the window.
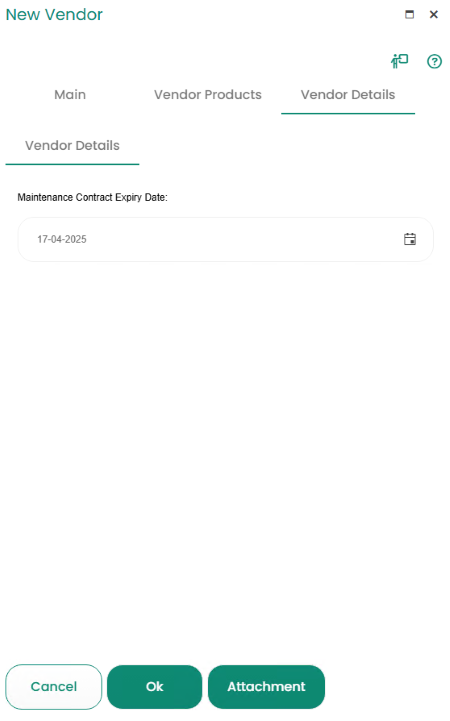
Vendor Details Tab
The Vendor Details tab can contain custom fields providing additional information, which can be added using the Custom Object Designer.
Managing Existing Vendors
Users with the ServicePRO Administrator Role can add, update, or de-activate a vendor as needed.
- In the Manage Vendors window, the Find a Vendor area appears as shown below.
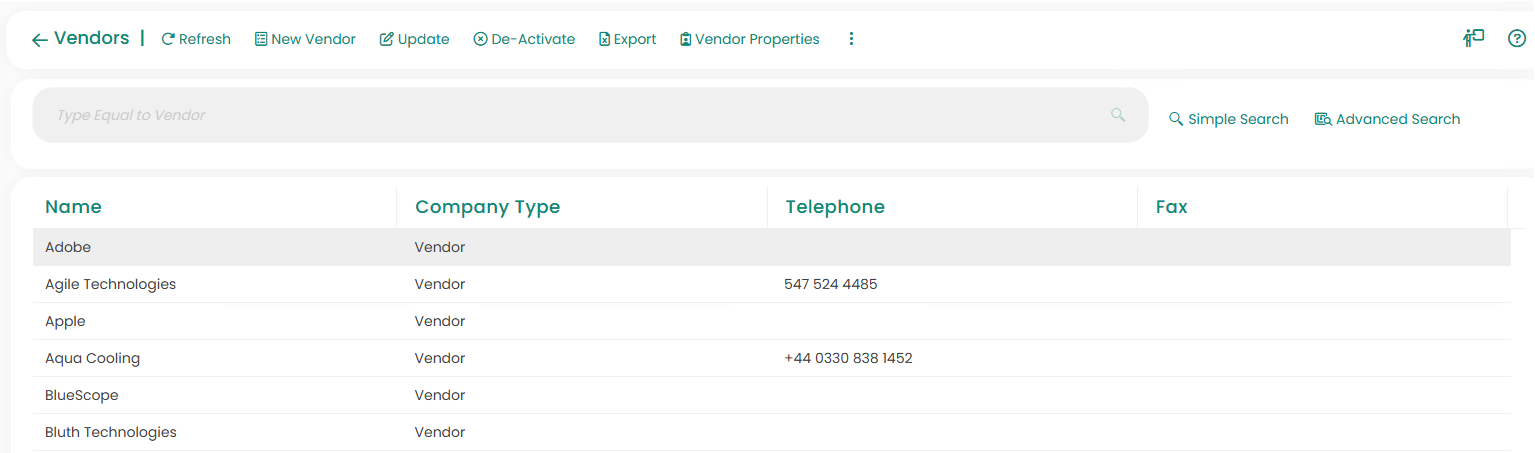 The Find a Vendor Window
- Click on Simple Search beside the search bar, to select criteria from the Search and Match drop-down lists and enter a value in the Value field to help you narrow the list presented in the table below this work area.
For example: Search: “Type” Match: “Equal to” Value: “Vendor”
This tells the system to search for all companies listed as type vendor. In the figure above, the search returned a table listing all vendors currently found in the database. - Click on the Ok button. The search results will be displayed in the table.
- Select the vendor you need to update by clicking on that vendor’s name. Select Vendor Properties in the above ribbon toolbar to display the vendor properties in a side panel. The Ribbon Toolbar for Vendor Properties, is as shown in the figure below.
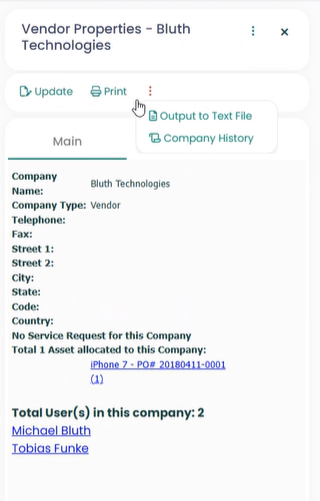 Manage Vendor Properties
Vendor Properties Ribbon Toolbar
Vendor Properties’ Ribbon Toolbar:

Management Task Group
- Update – Edit vendor information.
- Print – Print the vendor properties.
- Output to Text File – Allows you to save the vendor properties to the text file.
- Company History – View the vendor’s request history.
Manage Vendors Ribbon Toolbar

The Ribbon Toolbar includes several tasks:
1. Create
- New Vendor: Enter company information.
2. Manage
- Update: Edit vendor company information.
- De-Activate: De-Activate a vendor company from the listing.
- Export: Export the list of vendors in XLS format.
3. Properties
- Vendor Properties: View the vendor company’s properties such as name and address, list of user names associated with the vendor and summary of request count by status
4. History
- Vendor History: View a history of requests submitted by the selected vendor company during the date range that you specify.
5. Manage Search
- Set Current Search Filter as Default: Set the current Vendor Search results as your default. This setting will be kept for subsequent searches.
- Restore System Default Search Filter: Return the default Vendor Search filter to its original state.
- Customize Search Display Properties: Select and customize properties to be displayed during searches.
- Restore System Search Display Properties: Restore displayed search properties to their original state.